Diesel swirl flaps and injectors
Volvo S40, V50 (2004-), V70, XC70 (2008-), S60 (-2009), V70 P26 (2001-2007), S80 (2007-), C30, C70 (2006-), XC60 (-2017), XC90 (-2014)
14.11.2024Instructions for the replacement of the swirl flaps and injectors on the Volvo D5 engine, including the removal and install of the injectors. The injectors have to be taken out to remove the valve cover with the integrated intake manifold.
The pictures show the engine of a XC90 and XC70 P26, all models with the D5 engine are quite the same in this regard. However, the swirl flaps in the cylinder head are not present in all D5s.
Besides the swirl flap you need these parts according to Volvo:
- installation kit injector 5x
- sealing ring fuel return line 5x
- valve cover gasket
- hose clamp PCV system
- complete set of high pressure fuel lines
highly recommended:
- fuel return hose 1.5m
- injector solvent spray
- swirl flap linkage
- injector lubricant


If an injector is stuck, you may use the puller Volvo 9997335 (Skandix 1064396) with a suitable sliding hammer.

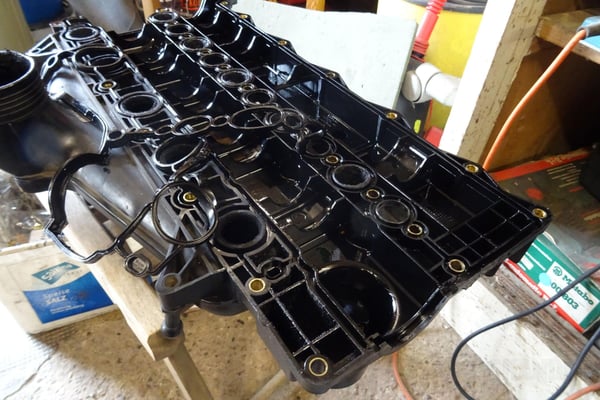
Now you can unscrew the valve cover and take it off. Clean the valve cover properly. Clean out the intake channels as good as possible, remove all soot from the area of the swirl flap to prevent it from jamming again in the near future.
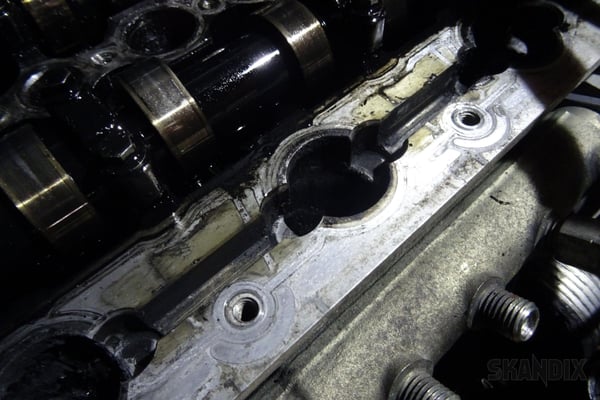
Lever off the linkage off the ball and take the swirl flap with all bearings out of the cylinder head. Clean the inlet ports in the cylinder head and the bearing areas too.

Now you can put in the new swirl flap, some slicone spray might help. Put the linkage back on now, since it is easy now.

- All notes serve only as an example and do not replace the workshop instructions of the automobile manufacturers! All information is supplied without guarantee!
Additional information...
- Installation guide: Diesel swirl flaps and injectors
14.11.2024, 884 KBytesDownload now
-
 1029780: Tumble valve
-
 1068780: Tumble valve
-
 1014606: Injection valve 1. Cylinder Kit
-
 1017179: Injection valve 2. Cylinder Kit
-
 1017180: Injection valve 3. Cylinder Kit
-
 1017181: Injection valve 4. Cylinder Kit
-
 1017182: Injection valve 5. Cylinder Kit
-
 1024528: Injection valve Cylinders 1-5
-
 1051496: Injection valve Cylinders 1-5
-
 1079444: Injection valve Cylinders 1-4
-
 1084539: Injection valve Cylinders 1-5