Wheel bearing rear axle Spicer up to 1969
Volvo PV, 120, P1800
01.12.2021Instructions for replacing the wheel bearing and calibrating wheel bearing clearance on the rear axle. Correct bearing clearance is essential for a long life of the wheel bearing. This type of axle can be found at the Volvo PV, Amazon and P1800 up to 1969.
Lift the vehicle or jack it up on both sides.
Unscrew the wheel and fully reset the rear brake.
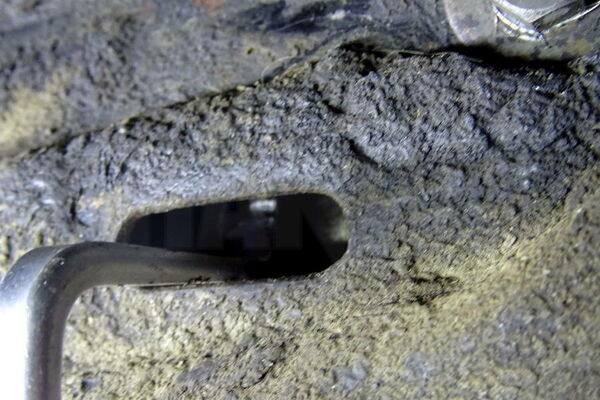
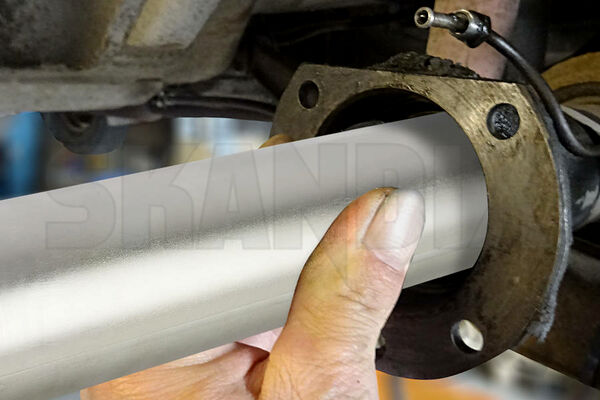
Because it is angled, our exhaust rubber hook (1057172) is a good tool for this job.
Empty the brake fluid reservoir and place the reservoir under the brake, then disconnect the brake line.
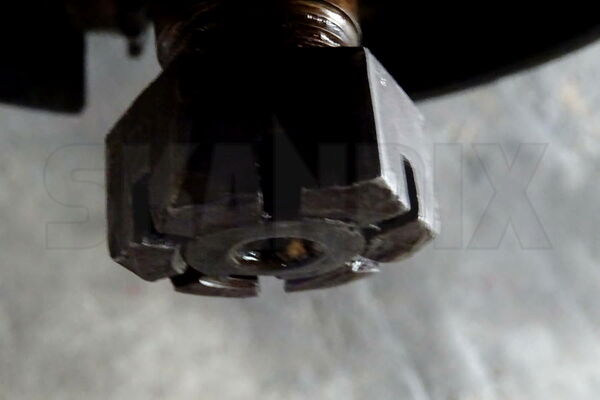
Remove the split pin and loosen the castle nut until the surface of the nut is flush with the end of the axle.
Now remove the brake drum to this position so that the brake drum puller does not damage the thread.
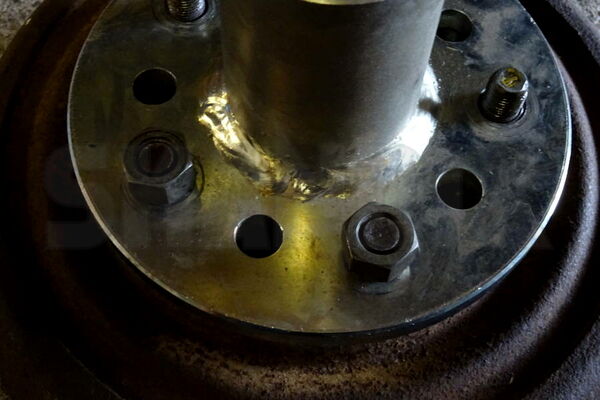
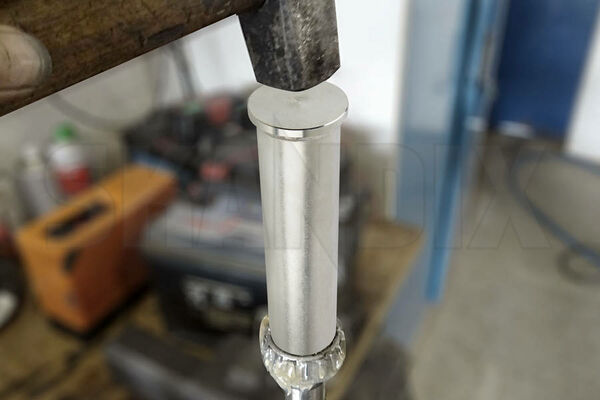
Now screw the puller (1007477) with the wheel nuts onto the brake drum.
Turn the spindle against the thru-axle and then continue to operate the spindle with a hammer.
When the brake drum is loose, unscrew the puller, unscrew the hub nut and remove the drum.
Of course, on the occasion of the same time check the condition of the brake.
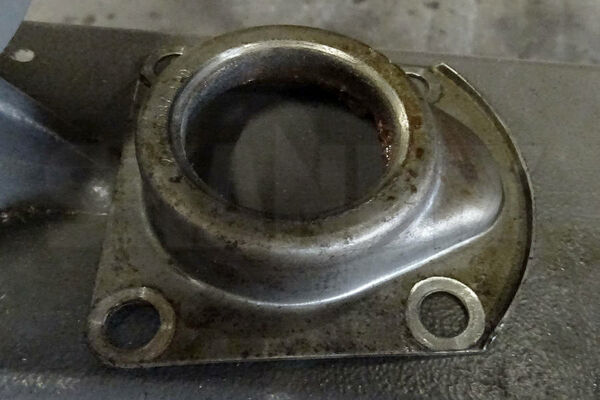
Now unscrew the bearing cap with the felt ring together with the retaining plate, seals and brake anchor plate with the four screws of the cover.
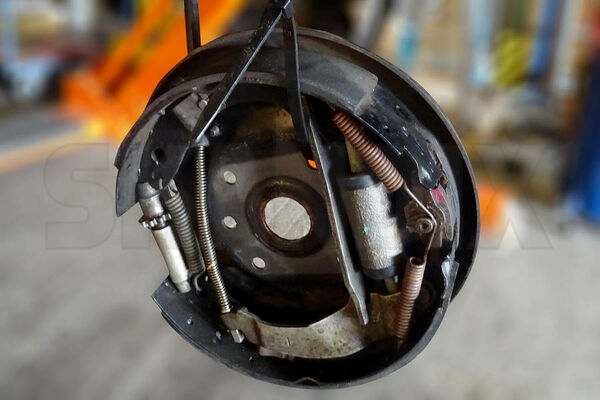
Pull the brake anchor plate over the axle and suspend it with cable ties at a suitable place. Remove shims and put to one side.
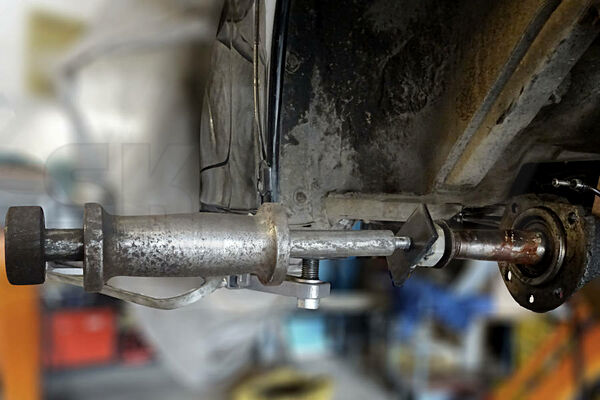
Remove the driveaxle including wheel bearing with slide hammer (Skandix 1074165) plus adapter (Skandix 1074166).
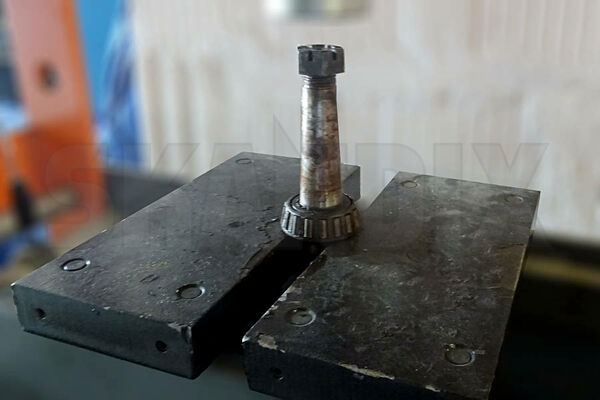
Turn the crown nut flush with the thread again to avoid damages. Then press the axle out of the bearing inner ring.
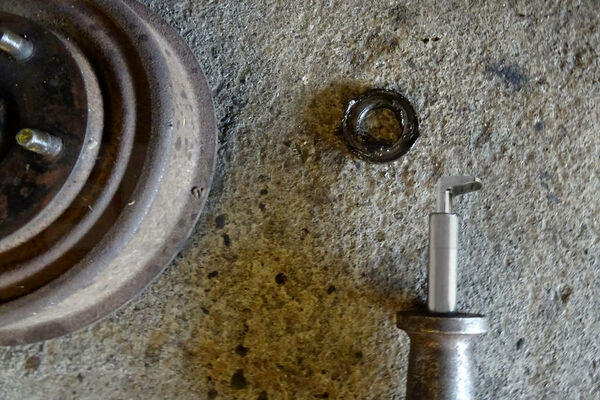
Knock out the shaft seal between the wheel bearing and the axle tube with slide hammer (Skandix 1074165) plus adapter (Skandix 1074306).
After cleaning the seat, use Drive-in sleeve (Skandix 1074169) to drive the new sealing ring straight into its seat.
Grease the sealing ring very lightly. Laying it in the freezer overnight can be helpful. Now fill the chamber above the sealing ring well with grease.
Now drive the new wheel bearing inner ring with Drive-in sleeve Skandix 1074167 onto the thru axle. Grease the bearing well with high quality roller bearing grease.
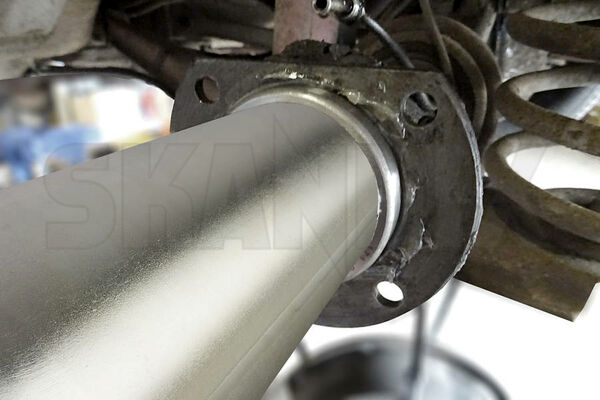
Then plug the thru axle back into the rear axle into its seat in the differential.
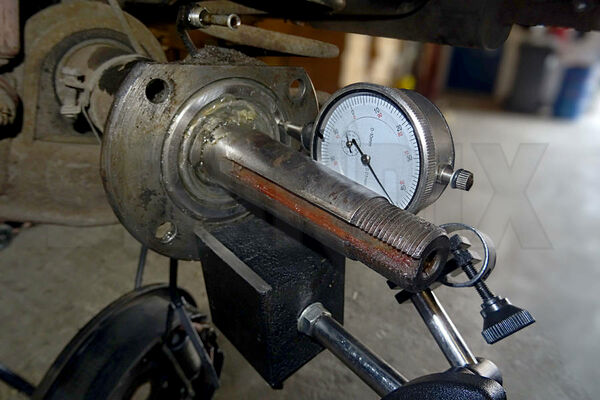
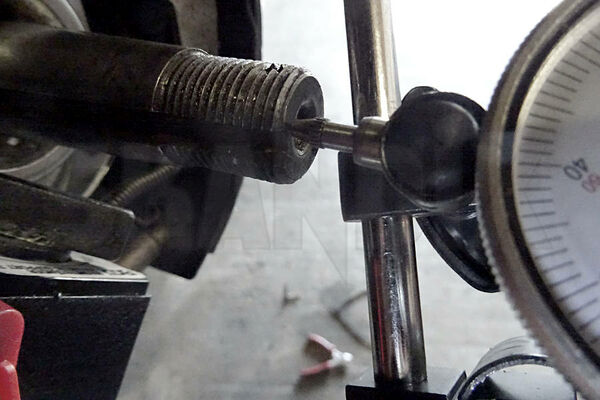
Now drive in the outer bearing shell with Drive-in sleeve Skandix 1074168 until it is just as possible to detect axial play on the thru-axle. The game must be 0.1mm +/- 0.05mm per side.
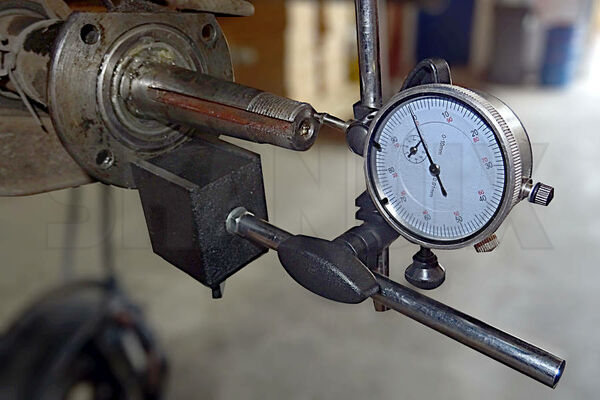
Now attach the dial gauge Skandix 1074179 with magnetic base Skandix 1074178 to the anchor plate seat and measure the clearance on the outside of the axle.
The bearing shell must be pushed in or out again until the play is right. For this purpose, the dial gauge must be removed again each time.
When the clearance is adjusted correctly, measure the difference in height between the anchor plate seat and the bearing shell. This height difference determines the thickness of the shims. In this case, it was 0.2mm.
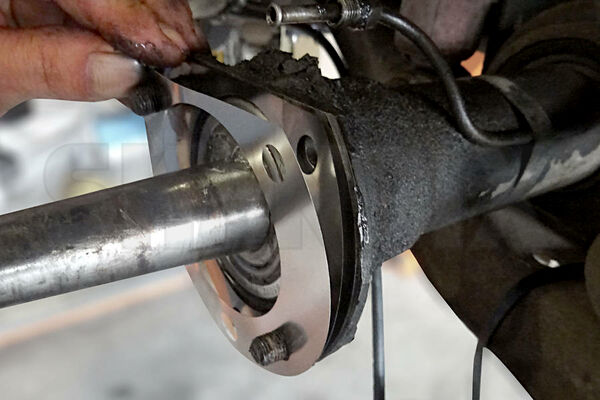
The screws for the anchor plate are inserted and the shims (here 2 x 0,1mm) attached.
Then the brake anchor plate carefully cleaned at its seat is put on, then the plate with the two seals, finally the galvanized bearing cover with the felt ring.
Lightly oil the felt ring and fill the lid with grease. Do not grease on the sealing surfaces!
The seat surface of the brake anchor plate must be absolutely free of dirt and rust, otherwise the measurement results can be greatly distorted.
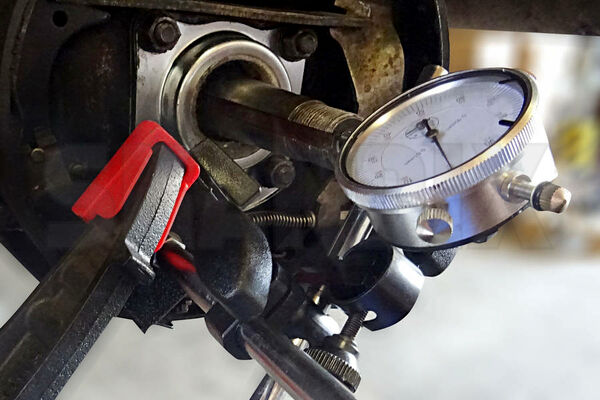
When the anchor plate is now tightened to 60NM, a control measurement is taken.
To do this, attach the magnetic base to the brake shoe and secure it with a screw clamp as shown in the picture, so that the brake shoe can not wobble.
If the game is out of tolerance, add more discs or play for less.
The clearance is again measured on the thru-axle during the control measurement.
If the clearance is right, the rest of the assembly in the reverse order of disassembly.
After bleeding and adjusting the brake, the ride can then start again with a long-term quiet rear axle.
- All notes serve only as an example and do not replace the workshop instructions of the automobile manufacturers! All information is supplied without guarantee!
Additional information...
- 1001227: Wheel bearing Rear axle fits left and right
- 1048817: Wheel bearing Rear axle fits left and right
- 1074167: Drive-in sleeve for inner ring, wheel bearing rear axle
- 1074168: Drive-in sleeve for outer ring, wheel bearing rear axle
- 1074169: Drive-in sleeve for inner oil seal ring, wheel bearing rear axle
- 1074166: Slide hammer adapter, chassis + steering for Drive shaft, rear axle System Spicer
- 1074165: Sliding hammer
- 1074306: Slide hammer adapter, chassis + steering for inner oil seal ring, wheel bearing rear axle System Spicer
- 1074166: Slide hammer adapter, chassis + steering for Drive shaft, rear axle System Spicer