Shift lever gaiter and shifter knob
Volvo V70 P26, XC70 (2001-2007), S60 (-2009), S80 (-2006)
12.08.2026Describing the Excange of the gear lever gaiter and the shifter knop in a Volvo V70 P26.

In cars with less care or high mileage often the leather coatin of the gaiter and the stift knop is damaged. This is the result of touching, moving and solar radiation, it`s looking unaesthetic.

You can delay this with forward-looking leather care and you also can repair small damages. But if the coating of the leather is so damaged as you can see in the picture no leather care may help you anymore.
The exchange of the gaiter and the shift knop is really simple and you don`t need many tools.

At first clip out the slim cover in front of the gear lever cover. Pull it straight as possible backwards.

Now you can see two notches on the front side of the gear lever cover. Push these notches backwards.

Pull the cover with the gaiter up.

Clip off the four notches of the gaiter from the cover

Now take away the cover and pull up the gaiter over the knob.

Under the knob you see a plastic sleeve. This sleeve has two notches, which you have to push for clipping off. Do this with a pipe wrench like you see it in the picture.

After clipping of pull the sleeve down.

Now you can take the knob and the gaiter away and you can seperate them.

Set the gaiter and the knob and pull up the sleeve while pushing the knob down for clipping in. The remaining assembly occures in reserved order. Please note the hints under the next pictures for the assembly!

And if you are ready with this: Your car will look like new inside with these often used parts in a new condition.
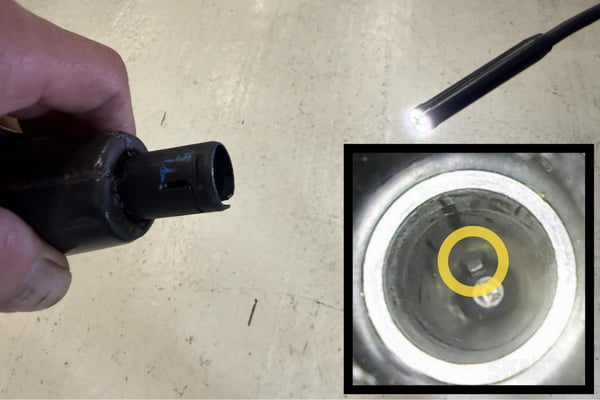
Be careful when fitting the gear knob: it has a nose on the inside that can easily be destroyed if positioned incorrectly.
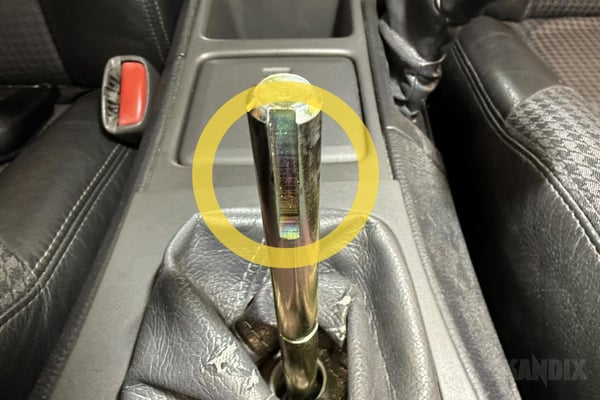
This tab points exactly forwards and guides the gear knob securely into the groove on the gear lever, preventing it from twisting. If this tab is damaged or the gear knob still wobbles despite being fitted correctly, it must be secured to the gear lever using an adhesive such as Innotec Adheseal. However, this will make it very difficult to remove without causing damage.
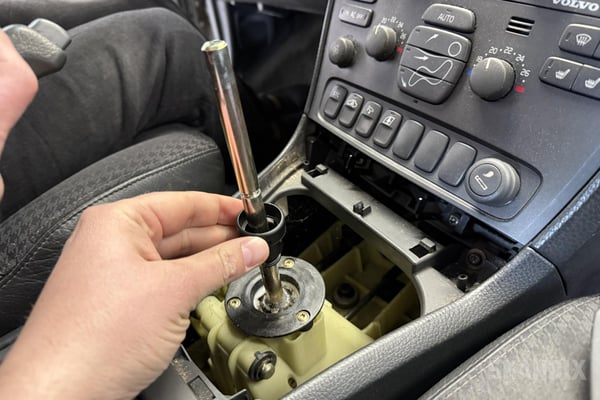
The sequence for fitting the shift knob and shift bag is as follows:Slide the lower locking ring onto the shift lever.
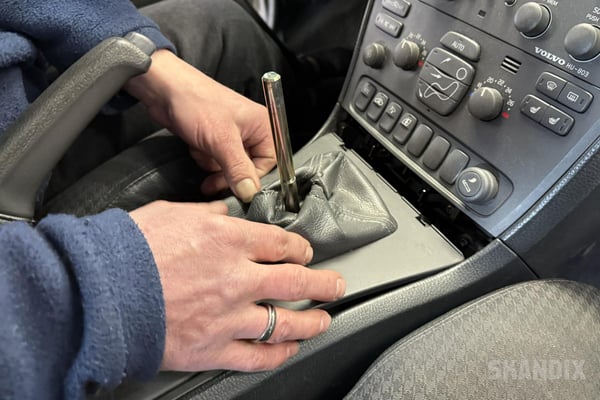
Place the sleeve over the gearshift base. Do not engage the cover yet!
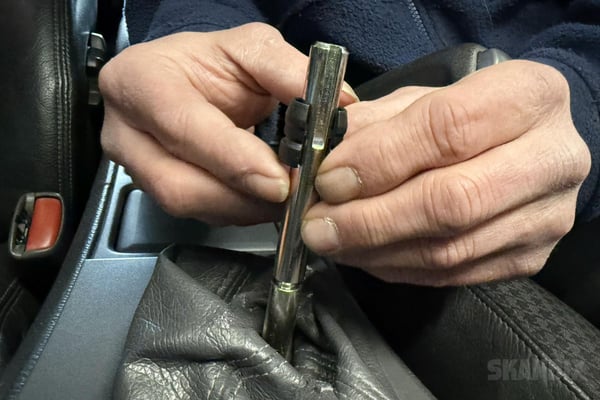
Now the inner locking ring is pushed slightly open onto the shift stick and positioned in its groove. Make sure that the opening is facing forwards.
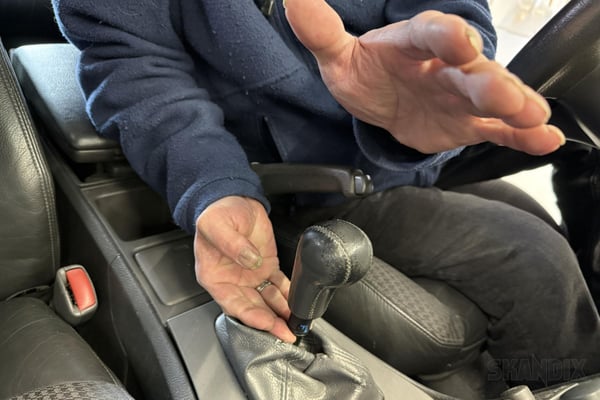
Now carefully place the knob in the correct direction as described above.
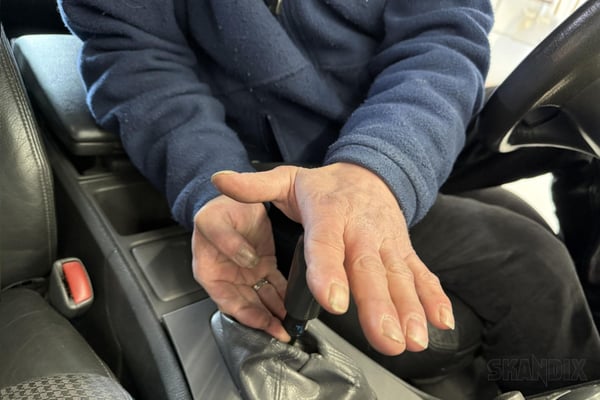
Hold the inner locking ring in position with two fingers and snap the knob into place with a light tap.
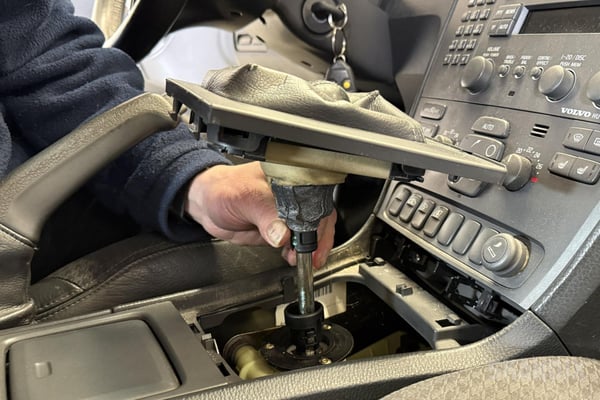
Now fold the cuff upwards and pull it over the lower edge of the pommel. The leather must no longer hang over the inner locking ring!
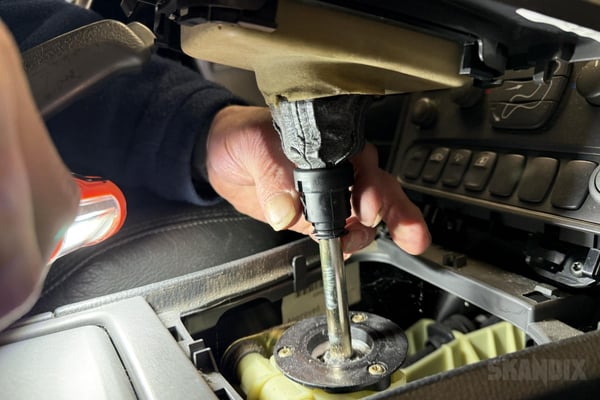
Now press the lower locking ring with the collar over the collar and snap it into the corresponding grooves on the gear knob. Please refer to the next slide for the correct position!
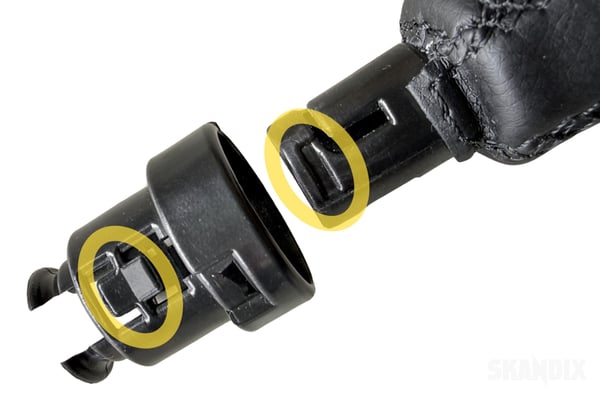
In this position, the locking lugs of the lower ring (left marking) must engage in the grooves on the knob (right marking). If the locking lugs are not seated correctly, the sleeve will not hold on to the gear stick!
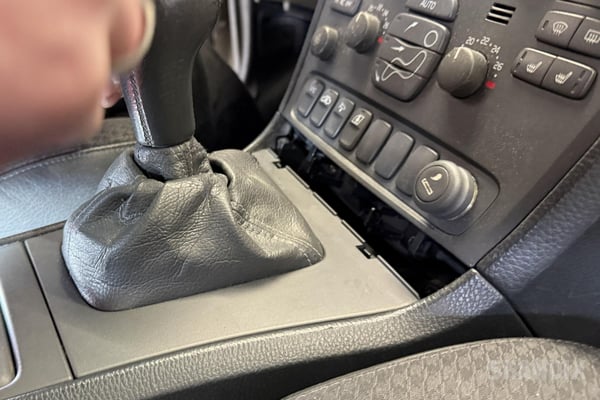
Done. The cover of the gearshift boot can now be snapped back into the centre console.
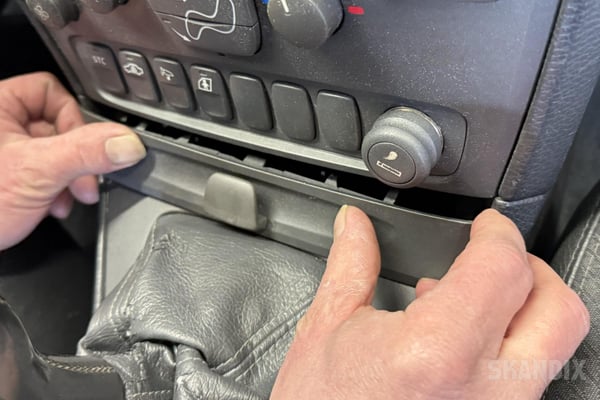
They then reinstall the panel with the spectacle holder.
- All notes serve only as an example and do not replace the workshop instructions of the automobile manufacturers! All information is supplied without guarantee!
Additional information...
- Installation guide: Shift lever gaiter and shifter knob
12.08.2026, 1.9 MBytesDownload now


