Repair kit Airfilter housing clamp
Volvo 200, 300, 700, 900, 850, S70, V70 (-00), S90, V90 (-98)
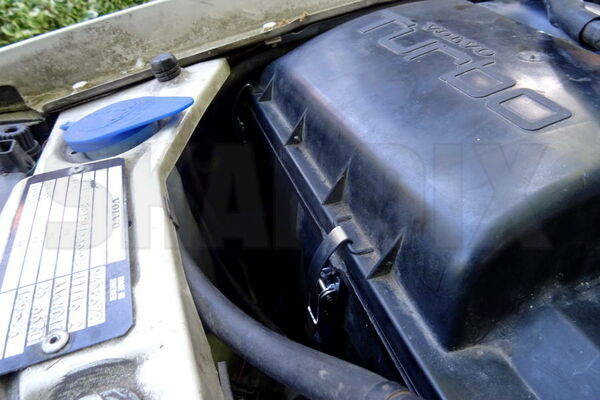
24.11.2021Instructions for repairing the closing clamps of the air filter box with the SKANDIX repair kit 1079199. Almost everyone who has driven Volvo 700/900 series Volvos for a longer time knows the problem: The clamps for the cover of the air filter box simply tear off at some point. The air filter housings are no longer available as new parts and up to now you had to make do with unsightly solutions such as cable ties or binding wire. We now offer an elegant repair solution that is almost identical to the original and will last for a long time. The example vehicle is Volvo 945 with B230FT turbo engine. On the models without turbo the air filter box is mounted on the left side of the vehicle, but the procedure is basically the same. In other Volvo Models, for example the 240 or 850 you have to identify the right position for the clamp at the airfilter housing. Therefore you have to consider the expansion of the clamp. In a Volvo 850 for example the clamp has it`s best position directly under the socket of the original clamp.
For installation, two 5mm holes must be drilled into the air filter box per lock, for which it must be removed.
Unlock and remove the plugs from the air mass meter and the crankcase ventilation, put the line aside.
Release the clamps from the air mass meter and put the air flow meter and the clamps safely aside as well.
Remove the cover of the air filter box and remove the air filter insert.
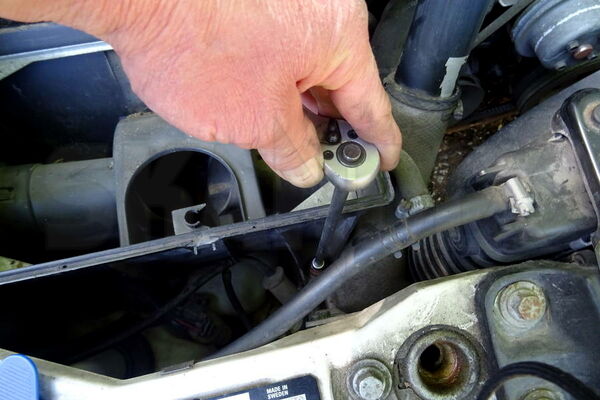
Unscrew the screw of the air filter box from the retaining bracket on the longitudinal beam.
Lift the air filter box slightly on the engine side and pull it out of the inner mudguard towards the engine, then remove it upwards.
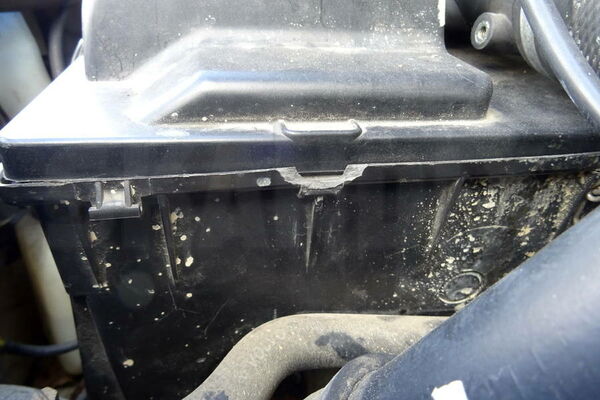
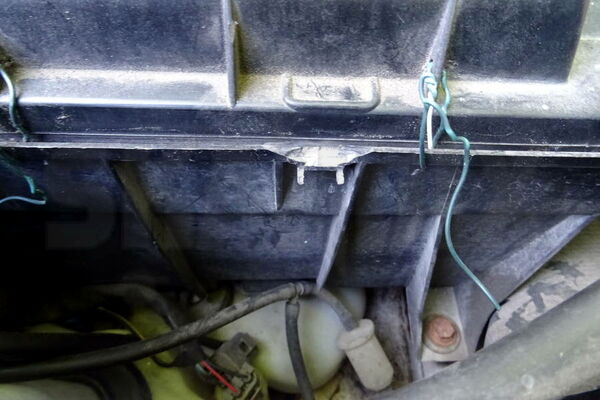
At the clamp positions where, as in the picture, there is a bar under the clamp, it must be ground away in the lower area up to approx. 22mm under the upper edge of the air filter box bottom part.
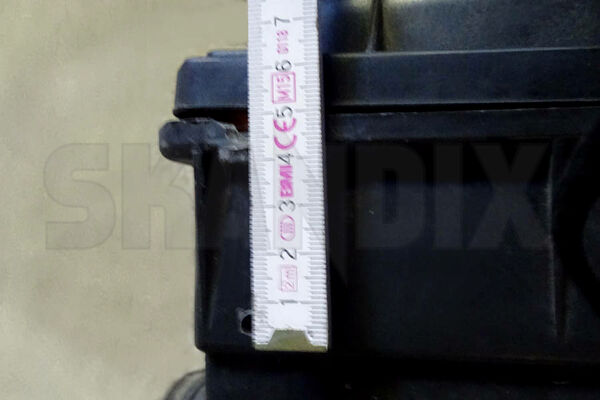
The holes for the base of the new bracket must be placed centrally under the old snap-in surrounds (see also Fig. 1).
First, only the lower hole should be drilled. Here the hole centre 49-51 mm below the upper edge of the air filter base should be drilled.
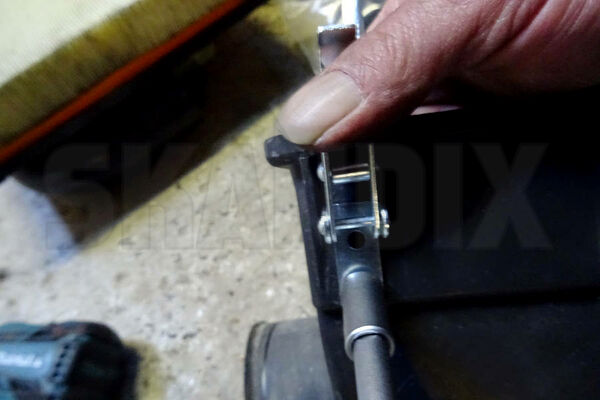
Now screw the base of the clamp only in the lower hole and use the smaller of the enclosed washers on the inside for this.
Align and tighten the clamp vertically. Only then drill the upper hole through the housing. The base of the clamp then serves as a template and the drill cannot be distorted.
Now screw and tighten the upper screw with the large washer on the inside of the air filter box.
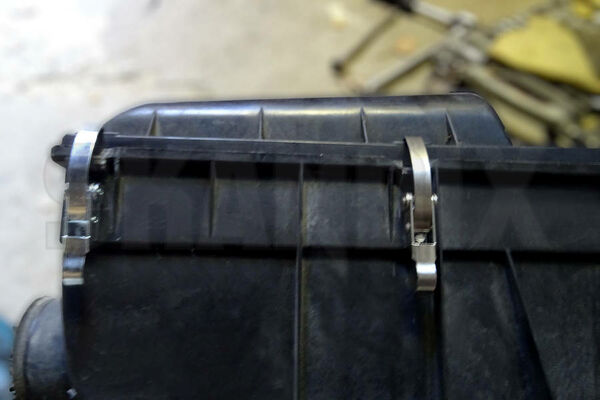
When all defective clamps have been replaced in this way, the air filter box can be reassembled.
This is a good opportunity to clean the air filter box right away and to install a new air filter insert!
Now the exchange of the air filter insert is again easily possible as with the original part and there is no more need for complicated handling with emergency solutions!
- All notes serve only as an example and do not replace the workshop instructions of the automobile manufacturers! All information is supplied without guarantee!
Additional information...
- 1079199: Clamp, Airfilter housing Repair kit