Headliner Kit
Volvo 700
24.10.2022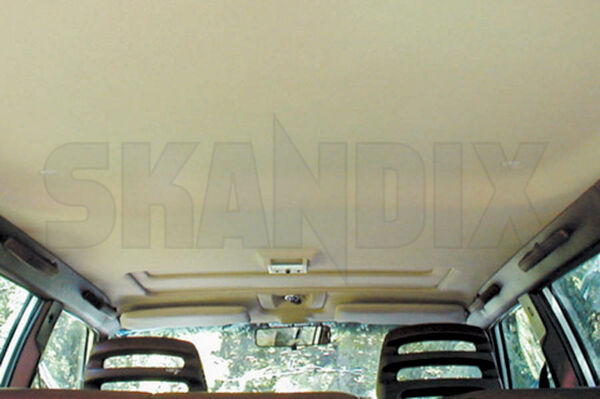
Kit includes roll of headliner material and repair manual.
SUGGESTED TOOLS:
- Putty knife
- Screwdrivers
- Nut drivers
- Scissors
- Torx drivers
- Razor knife
Removing headliner from car
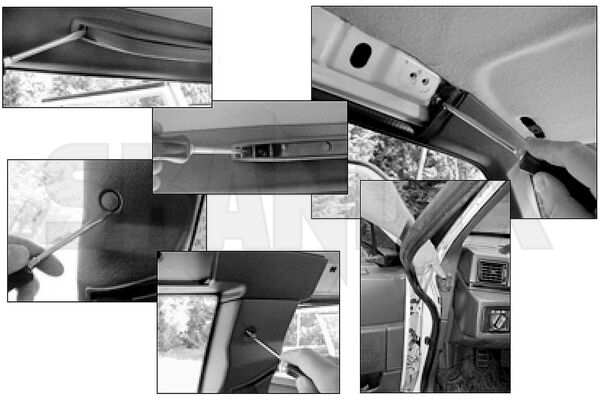
1. Remove the three inside grab handles as well as the dummy covers for the driver?s handle. Pry away the handle?s center trim, exposing the screws. The dummy covers pry off, exposing the screws. The trim above the front doors will now pull away from the car. It may be easier to remove the upper screw to loosen the vertical trim (seat belt cover) to give a little extra room. To do this, pry the screw cover from the bottom to reveal the screw. Once removed, the trim pulls away from the body. A sharp tug will release the vertical trim.
2. Remove the front pillar covers both left and right. First pull the door seal gasket away from the body. This will make it easier to pull the panel. Remove the upper hold down screw. Pull up and away from the pillar to release the three clips holding the trim. Push the vent boot through the lower part of the panel to completely remove.
3. Remove the sun visors left and right as well as the visor clips. The passenger visor may be wired for the lighted mirror. Disconnect wire at the lower pillar. And pull the wire through the headliner.
4. Remove the sunroof handle and then the sunroof gear cover. The handle has a center screw and the cover has two screws and once the screws are removed the panel is held in place by two clips in front. Electric sunroof -simply remove the cover panel.
5. Pry the rear view mirror trim away from the base of the mirror. Unscrew the mirror fasteners and remove
6. Pry the crimp trim from the sunroof opening. Start at the 2 joint clip at the rear and work your way around. Remove the headliner material from the surround where it is glued.
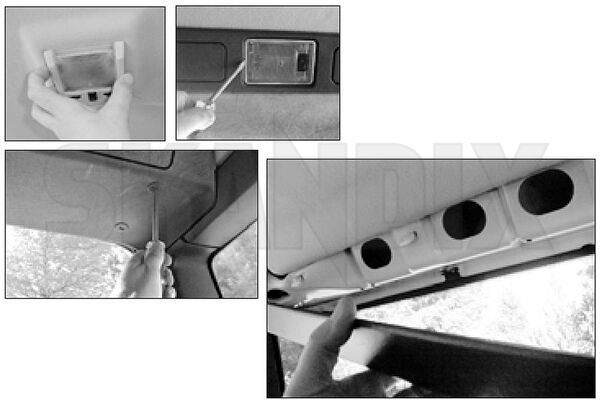
7. Remove the center dome light. Pry from the side and it will pop out. The light may be a little stubborn. Make a note of the wire positions on the backside of the light. Remove the white plastic spacers from the dome light opening. Wagon - Remove the rear cargo area dome light and note the wiring to it. Remove the screw behind the light that fastens the panel to the roof. Unscrew the five plastic screws that hold the rear panel to the roof and the panel will pull down. Sedan - Pull away the pillar and quarter window trim. Pry the seat belt trim out to make it easier.
8. Now remove the remaining top side trim pieces that extend from the rear panel to the front panel. These pull away with a sharp tug.
9. The only things holding the headliner in place now are the turn clips in the center of the headliner, the front plastic rail above the windshield, the metal clip under the dome light and, in sedans, a plastic rail above the rear window.
10. Now is the time to enlist the help of others as the removal is awkward and the headliner is very delicate.
11. Sedan - Put the front seats in the full recline position and have all the doors wide open and plenty of space to remove the headliner from the passenger side front door.
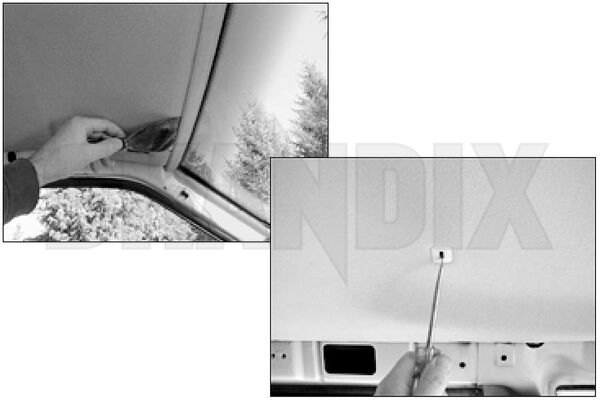
12. Remove the front plastic cross rail above the windshield. Use a putty knife and wedge it between the plastic and the headliner. Push the knife toward the windshield to release the rail from the clips. There are seven clips spaced about six inches apart along the rail.
13. Sedan - It may be easier to remove the rear plastic rail at this time especially for re-assembly. The rail is held in place exactly like the front rail. Use a putty knife to remove.
14. Use your helpers to support the headliner. Now remove the plastic turn screws with a straight screwdriver. Slide the headliner forward about two inches to release the dome light clip and at the rear. Now the headliner is free to be removed through the rear hatch on the wagon or through the right front door on the sedan.
Preparing the headliner for the new fabric
1. Place the shell on a clean flat surface where it is safe from being damaged and is easy to work on. A large table is excellent or the floor will also work. It is important that the old fiberglass shell for the headliner is in good shape and all the foam is completely removed to provide a good gluing surface for the new headliner material. Support the shell in critical places where it may put too much stress on the shell. Folded newspaper works well when stuffed under the dome light opening and under the mirror opening as well as along the sunroof opening.
- All notes serve only as an example and do not replace the workshop instructions of the automobile manufacturers! All information is supplied without guarantee!