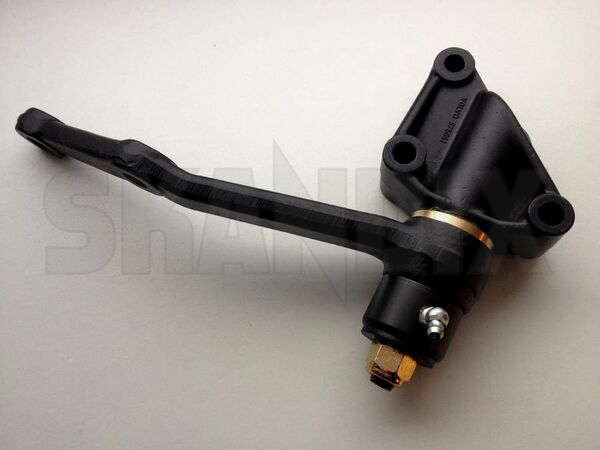
Bronze reversing lever bushing with grease nipple
Volvo 121, 140, 164, P1800, P1800ES
10.12.2021Installation manual for the low-wear bronze reversing lever bushing, SKANDIX 1060063.
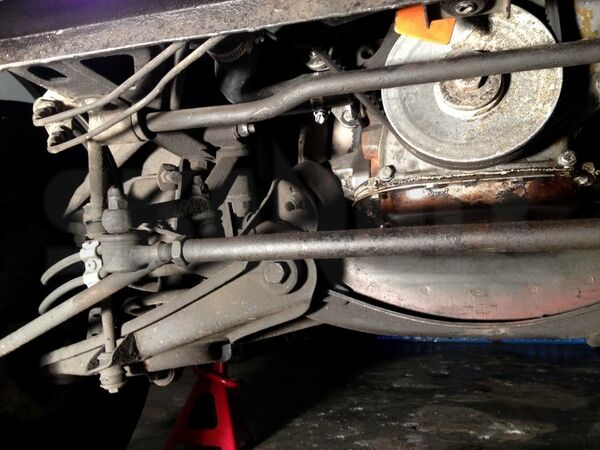
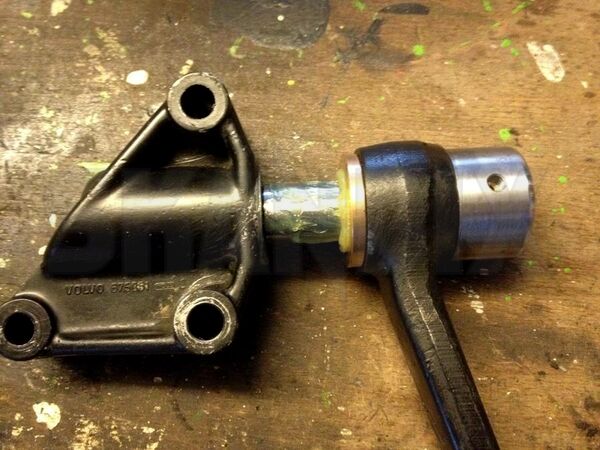
Jack the front of the vehicle. Notice the installation position of the reversing lever.
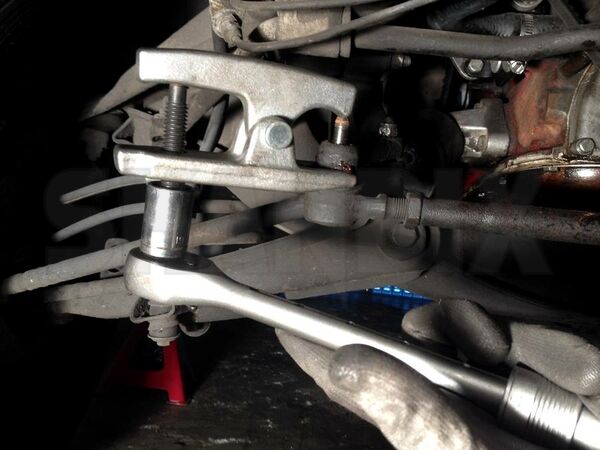
Press out the tie rod ends (Tool Skandix 1014296 or 1052557).
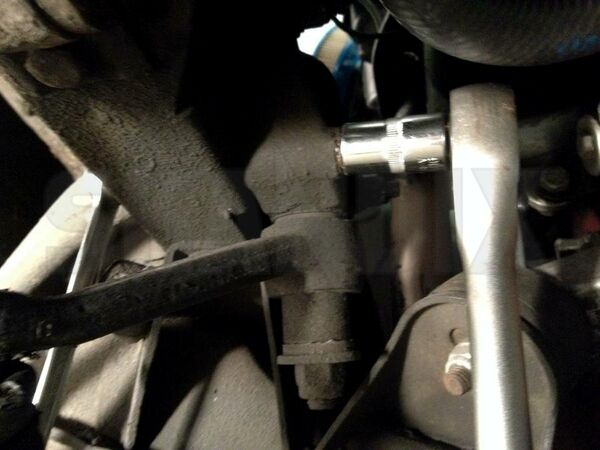
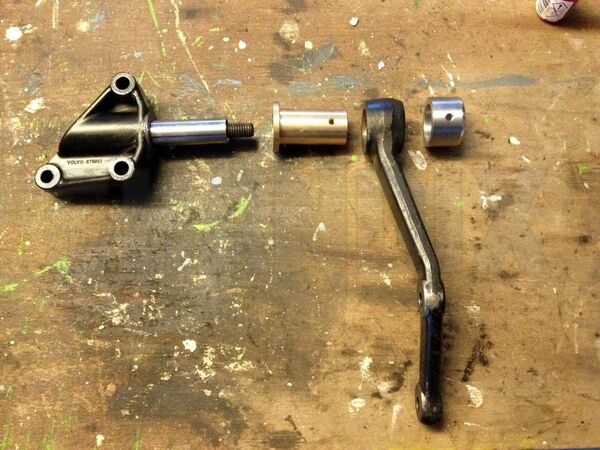
Remove the reversing lever.
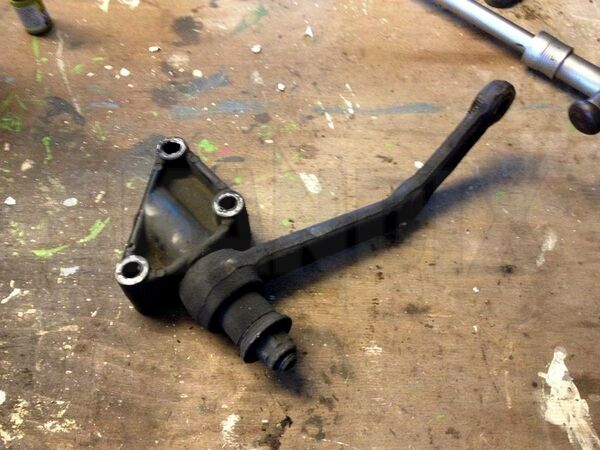
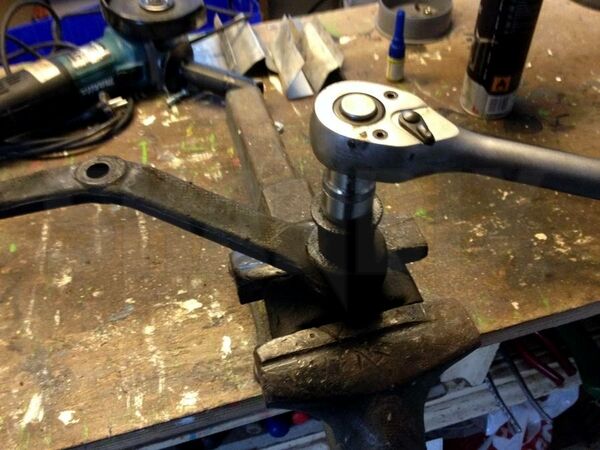
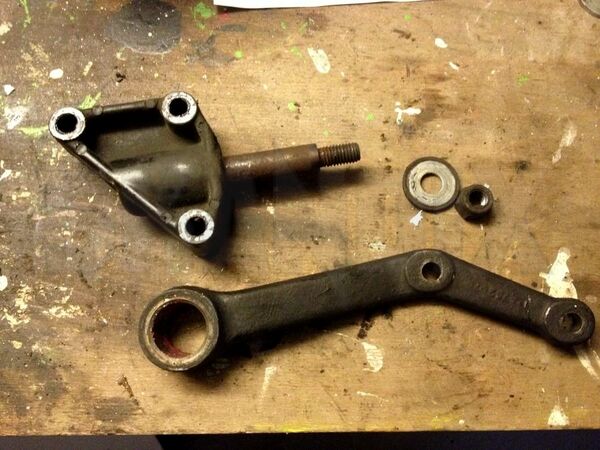
Remove the nut and dismantle the reversing lever.
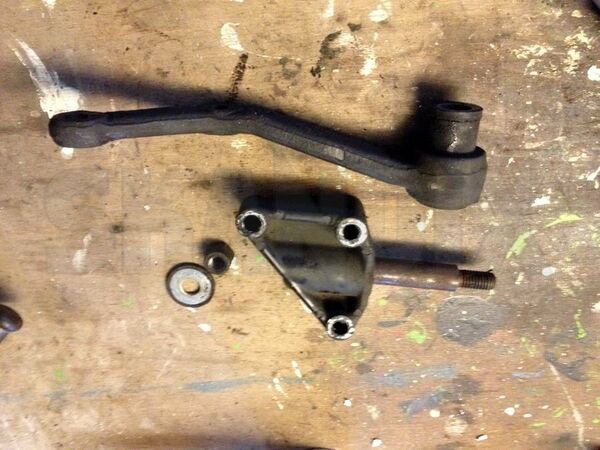
The genuine bushing is pressed into the pitman arm.
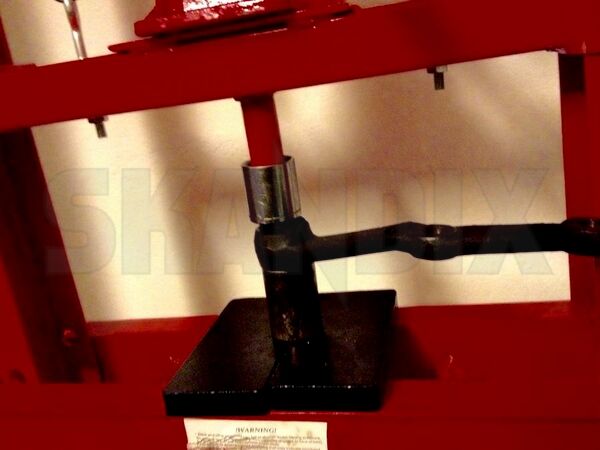
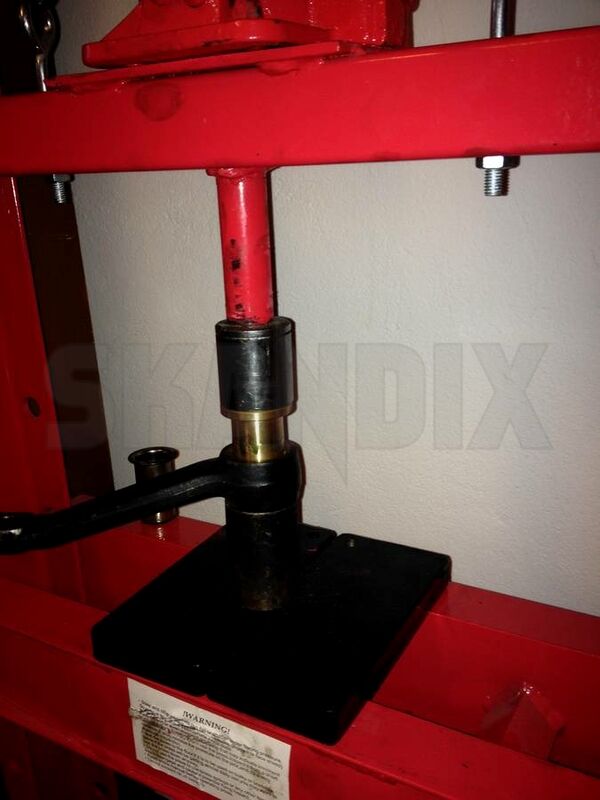
Press out the old bushing.
For the following work we used a hydraulic workshop press. You can do it at home with a big vice as well.
The bushing must be pressed out with the steel sleeve.
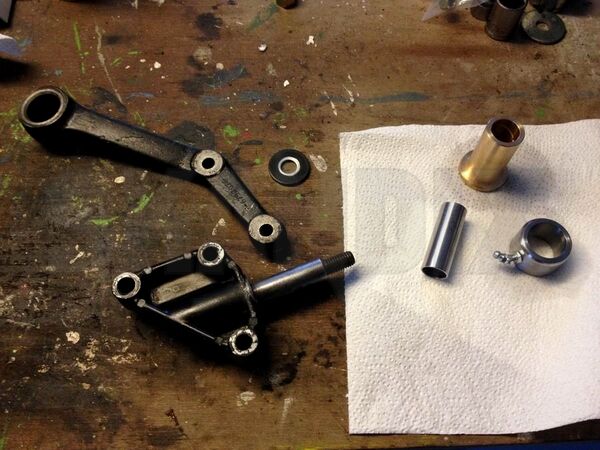
Carefully clean and degrease all parts. Degrease the parts of the new bushing too.
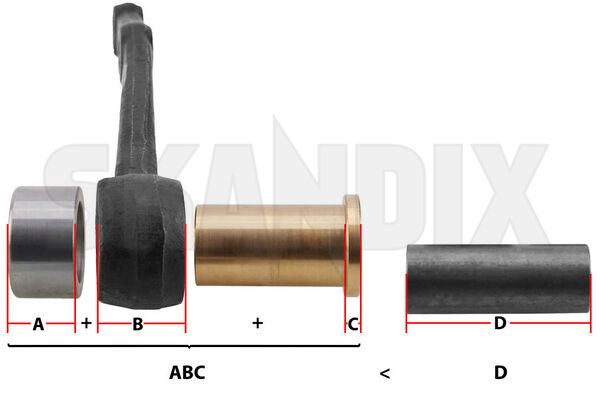
Before assembling check the pitman arm eyelet:
- Measure the height of the parts. The total of A+B+C must be smaller than D.
- The facing surfaces must be clean and free from rust or burrs.
If you do not follow these steps, the nut and washer will clamp the bearing after assembly, and the washer may rotate with it. A later correction would be very hard.
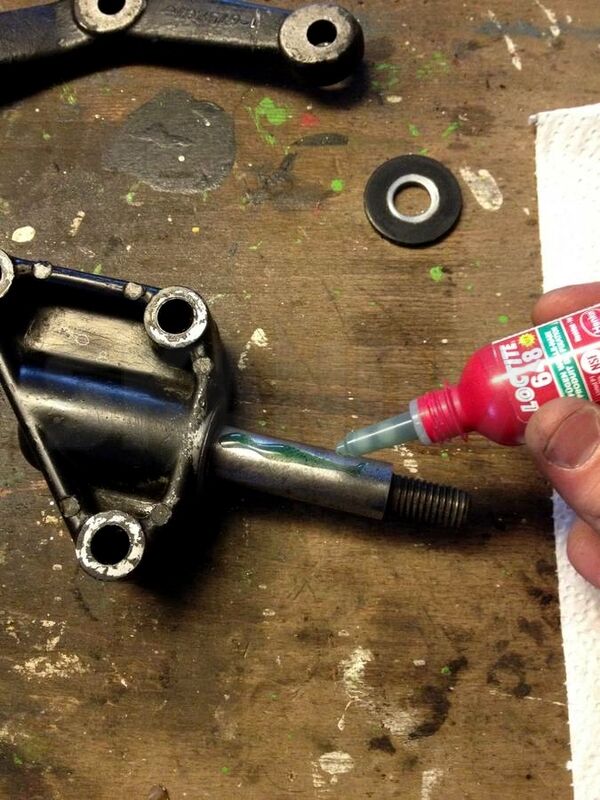
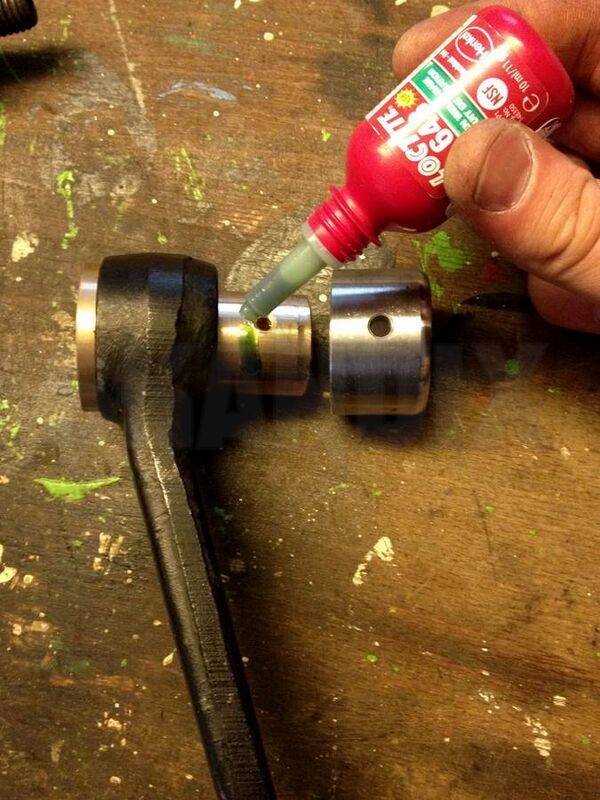
Attach retaining adhesive to the reversing lever shaft. We used Loctite 648 (Skandix 1027973).
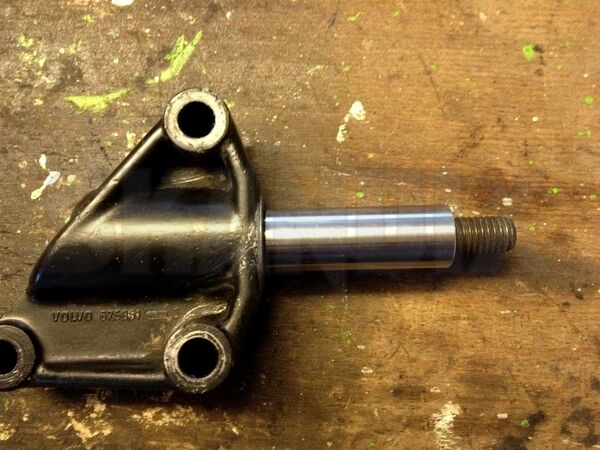
Press the long steel from the kit sleeve onto the shaft, wipe off excessive Loctite.
For the next step we need to know the precise installation position of the reversing lever (Step 1). The Bronze bushing and the thick steel sleeve have a hole for the grease nipple. The holes must finally match each other.
Put the parts at the workbench and test the best position. The grease nipple must be reachable when the reversing lever is installed and the grease nipple may not block the steering.
We show the correct position for a Volvo 140 left hand drive. The grease nipple points to the engine.

Attach retaining adhesive to the part of the bronze bushing which is going to be pressed into the pitman arm.
Straightly press in the bronze bushing.
Attache retaining adhesive to the bronze bushing.
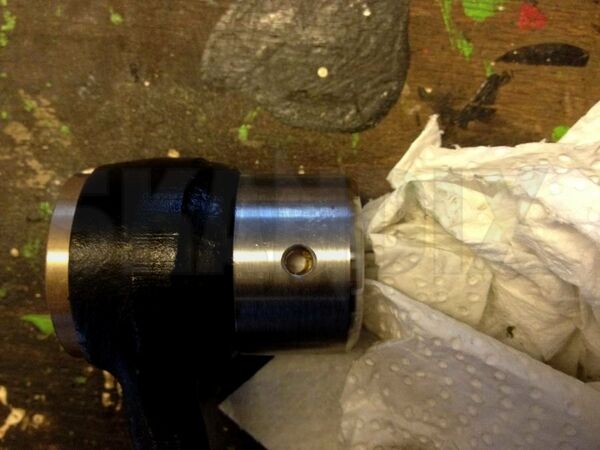
Put on the steel bushing. The holes must match each other. Make sure that there is no loctite in the holes.
Grease the shaft and put on the pitman arm.
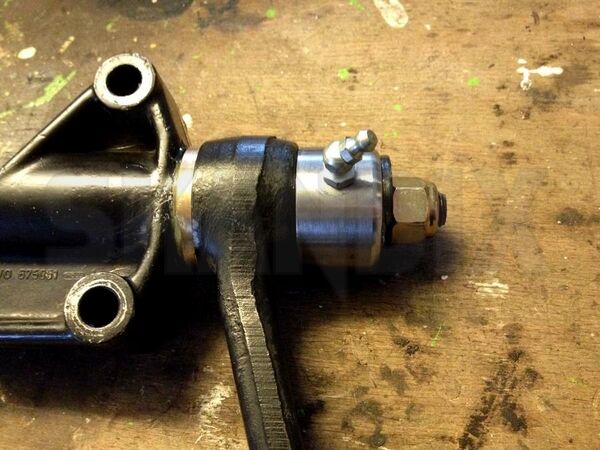
Install the washer and a new nut (Skandix 1012121). Tighten the nut until there is no play. Do not tighten the nut too tight!. It could be that the part has a little run-in period to come loose.
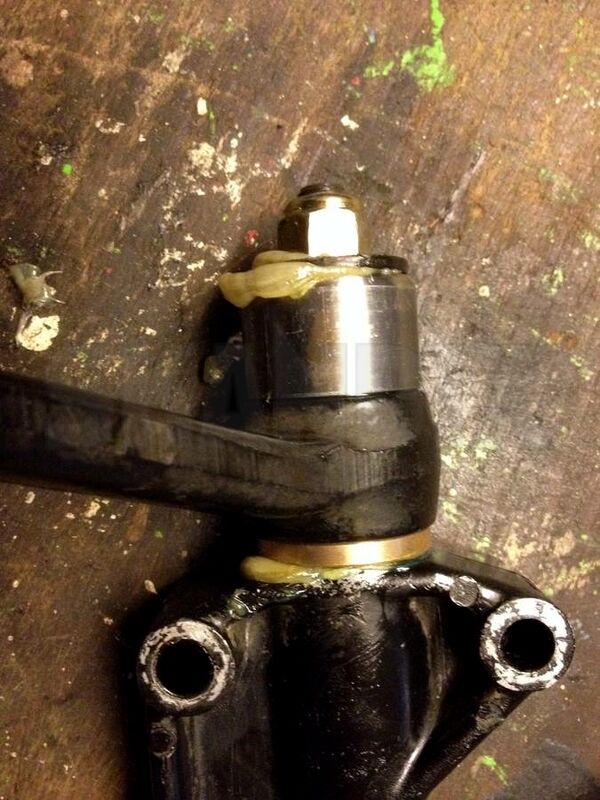
Mount the grease nipple and fill the bushing with a grease gun (Skandix 1026273, 1017914). The bushing is filled up when grease comes out at the top and the bottom.
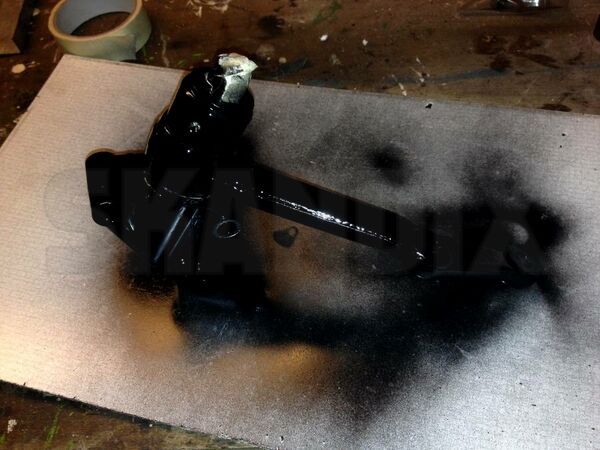
The Steel sleeve must be protected from rusting. We used the opportunity to paint the complete reversing lever.
Re-Grease the bushing every 5000 km (At every engine oil service).
- All notes serve only as an example and do not replace the workshop instructions of the automobile manufacturers! All information is supplied without guarantee!
Additional information...
- 1060063: Bushing, Idler Arm Bronze with grease nipple