Washer nozzle for rear view camera
Volvo V60, V60 CC (2019-), V90 (2017-), V90 CC, XC60 (2018-), XC90 (2016-)
09.02.2026Many Volvo with a reversing camera are delivered from the factory without a washer nozzle for the camera. We show here how the washer nozzle can be retrofitted quite easily using the vehicle manufacturer`s retrofit kit.
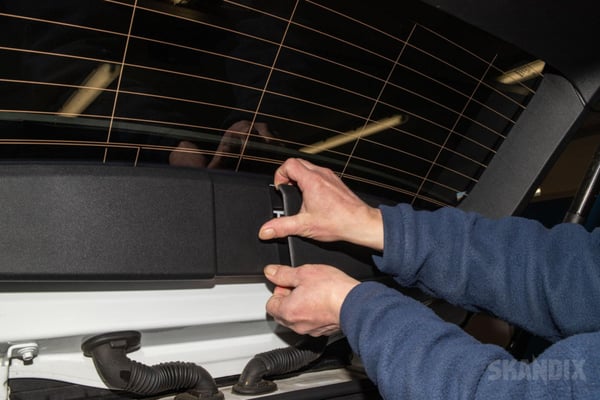
Remove the panelling from the tailgate. Start at the top right in the centre of the back screen frame on the overlapping part. To do this, pull the panelling down inwards, i.e. towards the lower edge of the tailgate.
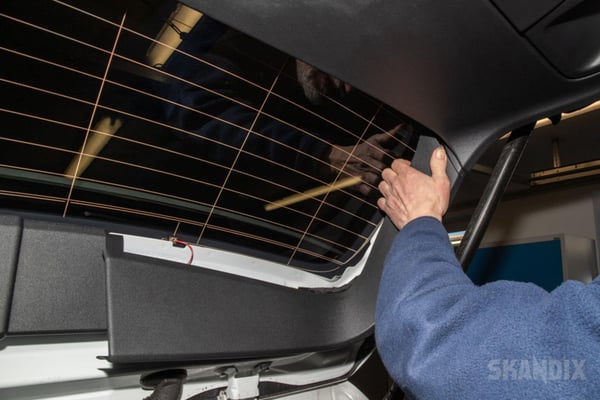
Once you have loosened the top cover, pull out the side section towards the back screen and put it aside.
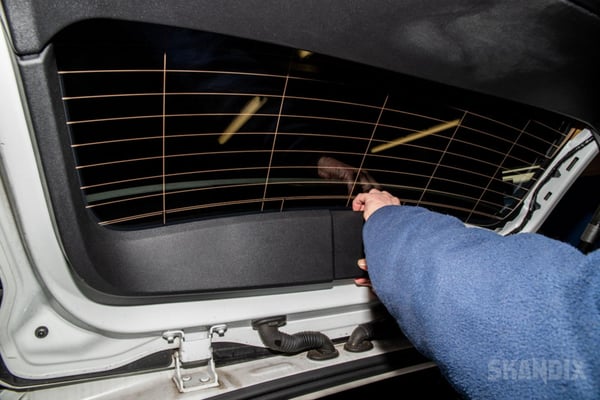
Now loosen the panelling on the driver`s side in the same way, top first.
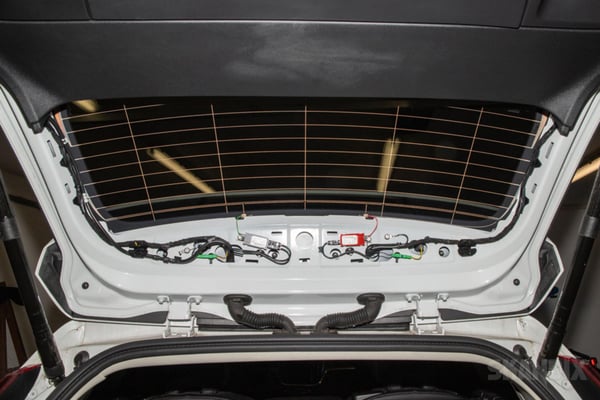
Now remove the lower panelling.
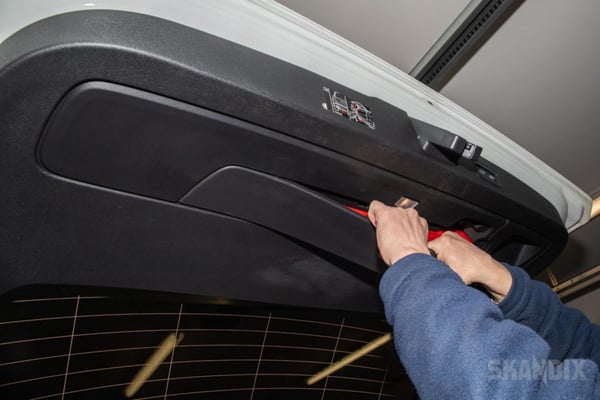
To do this, first open the compartment for the warning triangle.
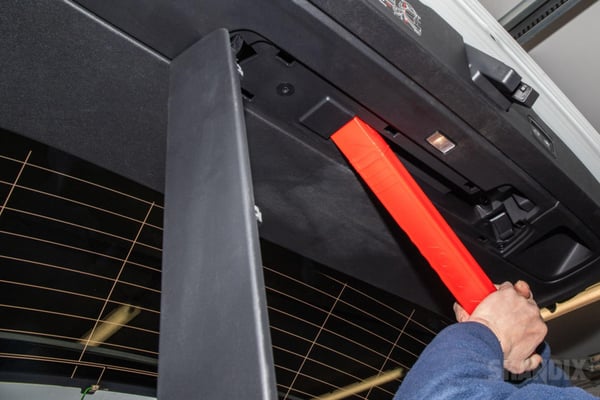
Remove the warning triangle.
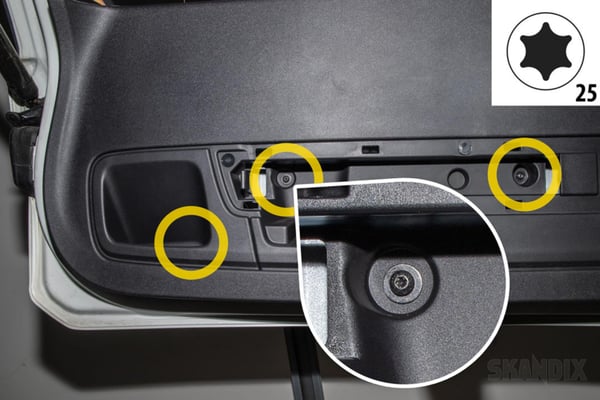
Unscrew the three T-25 screws. Two under the warning triangle, one in the recessed grip.
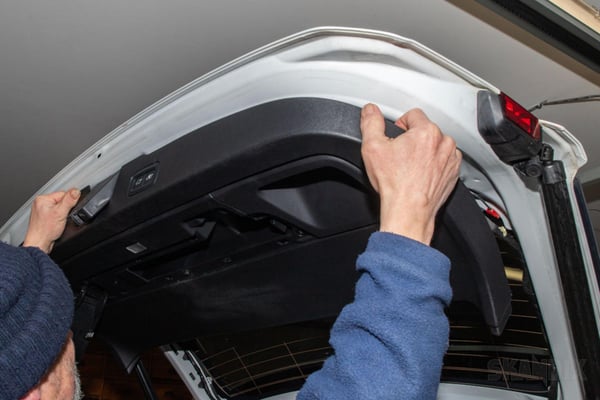
Now you can carefully pull the panelling downwards. There are still two plugs in the panelling!
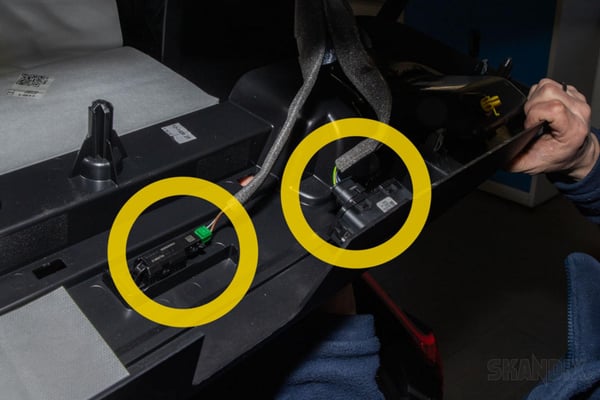
Disconnect the two connectors from the interior light and the lock button. Then put the panelling to one side.
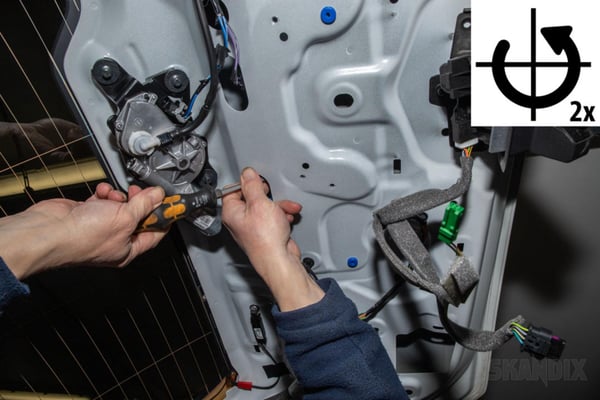
Loosen the three T-25 screws on the rear of the boot opener by two to three turns. Do not unscrew them!
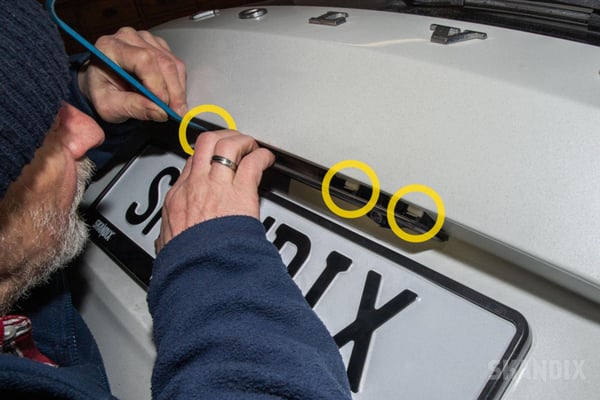
Carefully lever out the boot opener.
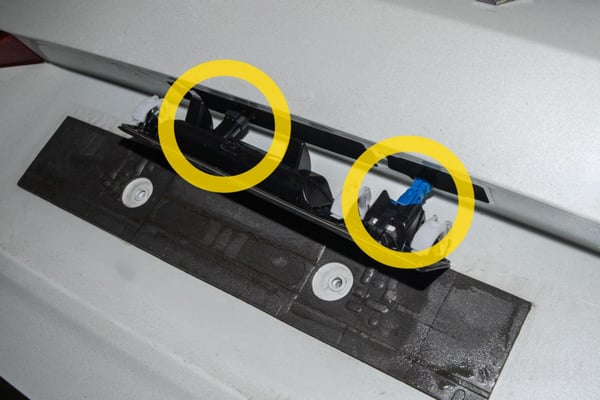
Disconnect the connectors from the boot opener and camera.
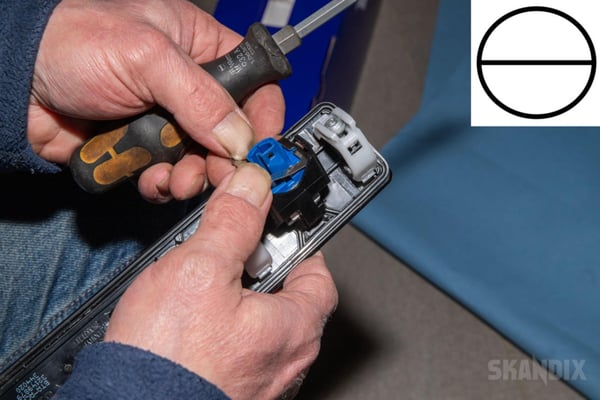
Remove the camera from the boot opener. You will need a flat-blade screwdriver to lever off the locking plate.
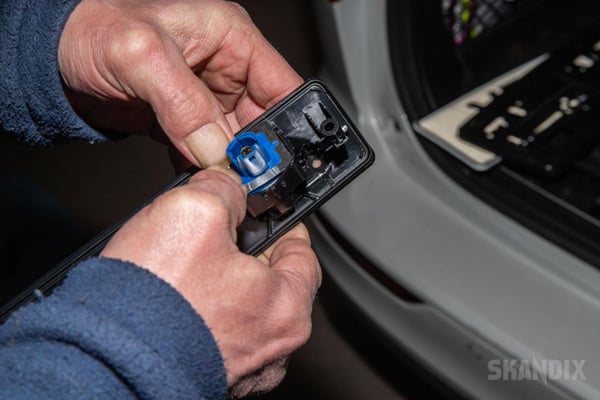
Mount the camera in the new opener handle.
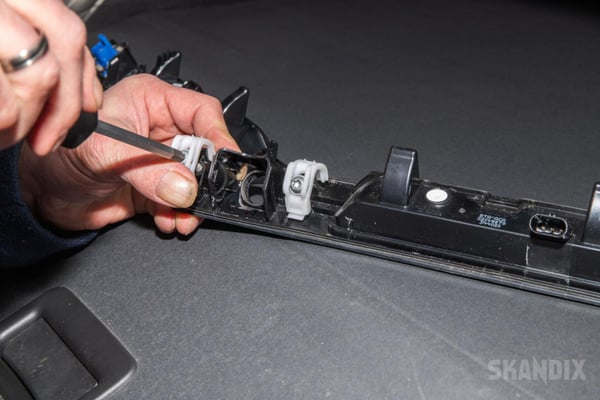
Now unscrew the retaining clips from the back of the old boot opener, you will also need them for the new one.
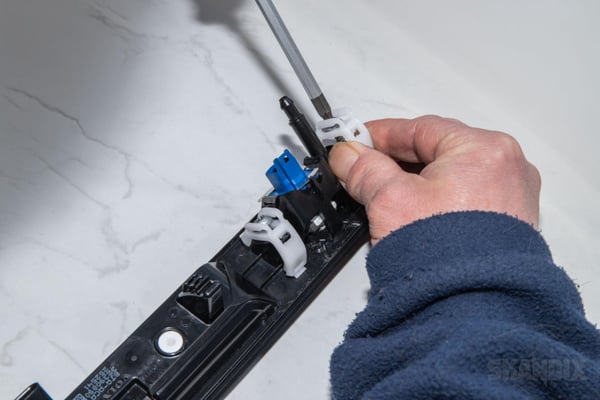
First place the washer nozzle in its position next to the camera, the retaining clip next to it also holds it in place. Now carefully screw the retaining clips onto the guides. Make sure that the retaining clips are correctly positioned, otherwise the guides could bend or break off. Leave the screws unscrewed two to three threads.
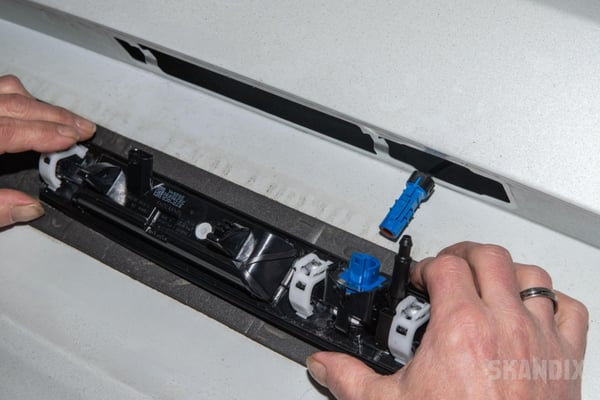
Now thread the hose through the opening in the boot lid and push it on. The hose should sit at least 5 mm above the cone on the connection. Plug the connectors into the camera and opener and snap the boot handle into the tailgate.
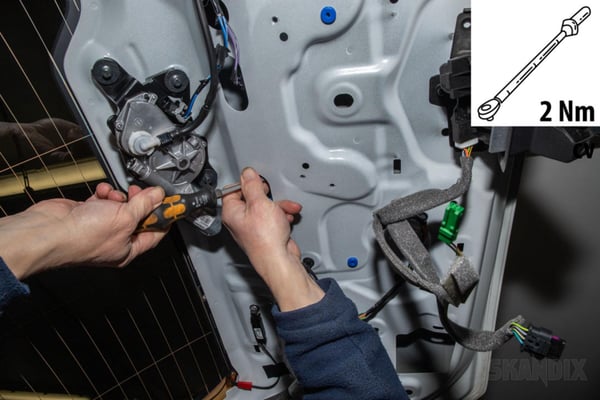
Once the boot opener is now engaged, tighten the screws on the three retaining clips to approx. 2 Nm.
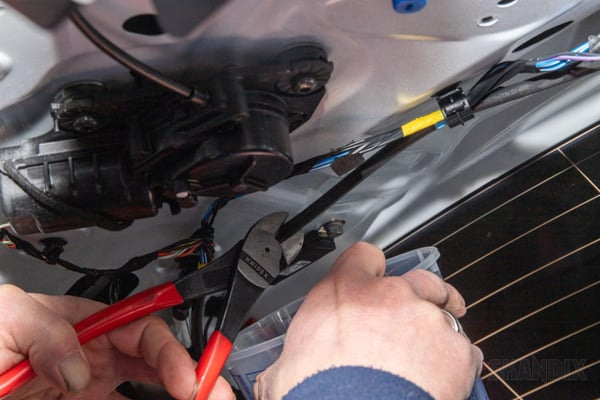
Now cut the hose for the rear window washer nozzle at a suitable point. Bear in mind that you will have to press the hose onto the connector with some force. The connector must not rub anywhere afterwards. Also place the hose of the camera washer nozzle generously at this point. Ensure that the hose is laid without kinks.
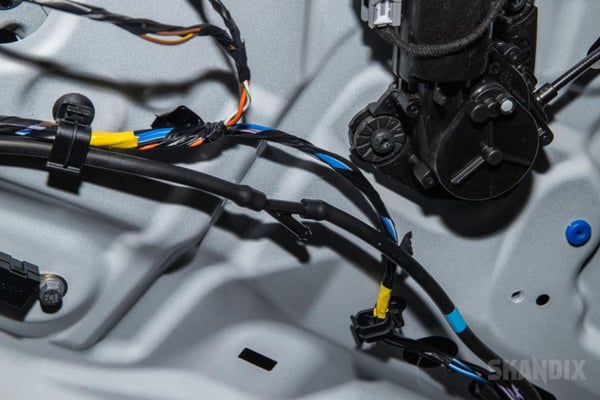
Now push all three hoses onto the Y-distributor with a little force.
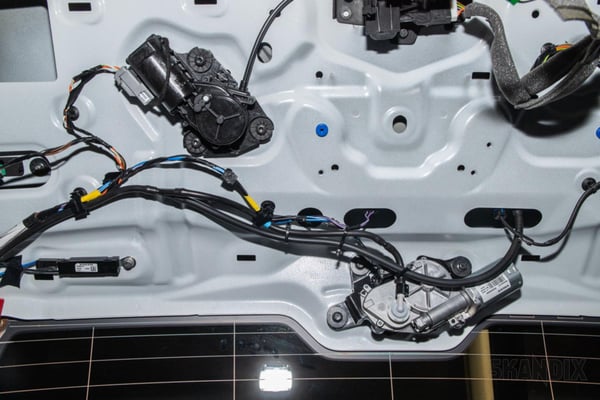
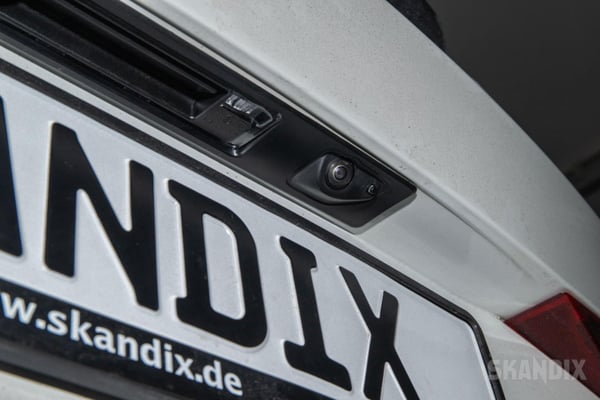
The new opener with camera washing nozzle is now fully assembled. The rest of the assembly is carried out in reverse order. Do not forget to plug the connectors back into the boot panelling.
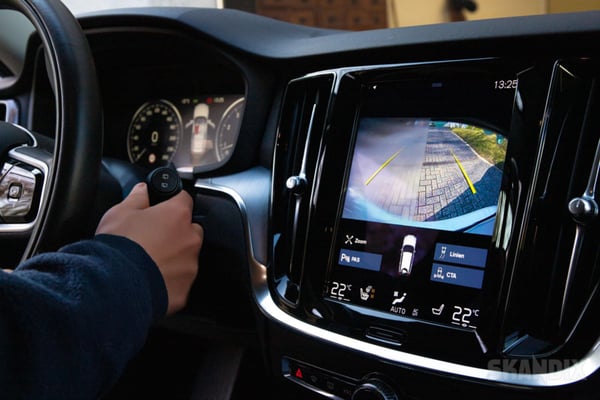
The washer nozzle for the camera is now ready for use and is operating together with the rear window washer nozzle for a clear view on the monitor.
- All notes serve only as an example and do not replace the workshop instructions of the automobile manufacturers! All information is supplied without guarantee!
Additional information...
- Installation guide: Washer nozzle for rear view camera
09.02.2026, 1.7 MBytesDownload now
-
 1098280: Washer nozzle, Rear view camera