Moulding A-pillar / Windscreen / Drip rail
Volvo V70 P26, XC70 (2001-2007), S60 (-2009), S80 (-2006)
21.12.2021Installation note for replacing the cover strips next to the windscreen on the Volvo V70 (P26) and V70XC (XC70) from model year 2000 to 2007.
The basic procedure is the same for the S60 (-09) and S80 (-06) sedans.
First of all, we would like to point out that this is not a job for the winter. Plastic parts are much more brittle at cold temperatures and break much faster.
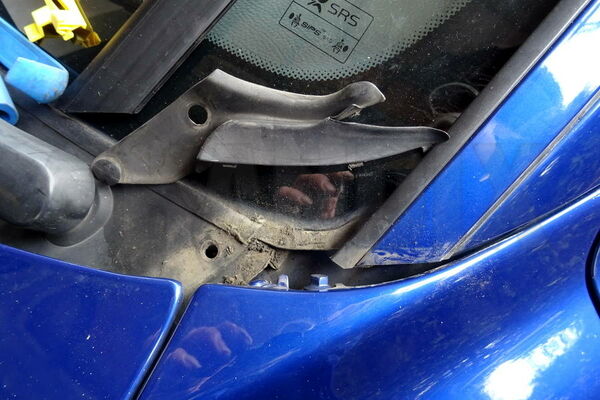
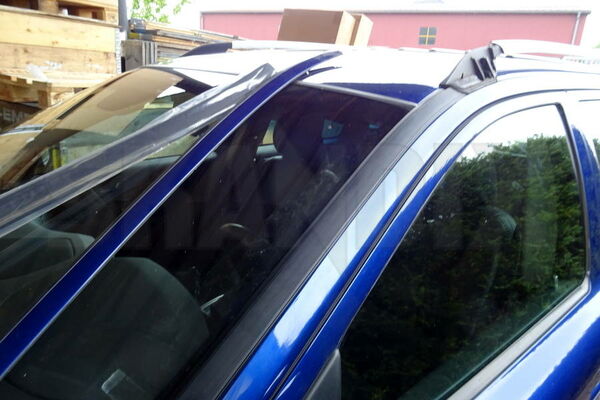
First remove the side cover of the lower edge of the window:
- Remove the two clips on the bottom cover. The upper of the two is also sometimes an expanding rivet, which must then be replaced in any case.
- Carefully press the cover down and unscrew it towards the middle of the vehicle.
Make sure that the three latches towards the mudguard do not tear off.
On the Wagon models, loosen the front foot of the roof rails. To do this, press the rear cover apart at the sides and push it forward.
Loosen the two T30 screws of the rails completely.
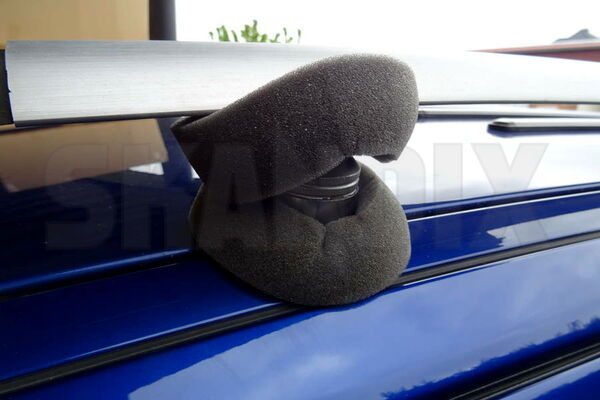
Lift the railing at the front and support it with something suitable so that the foot hangs approx. 2cm in the air.
Attention - do not bend the railing!
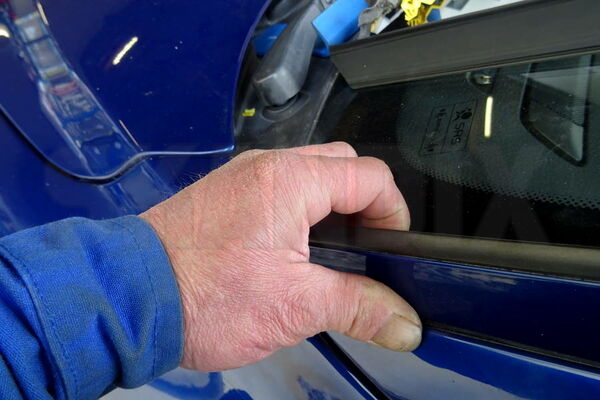
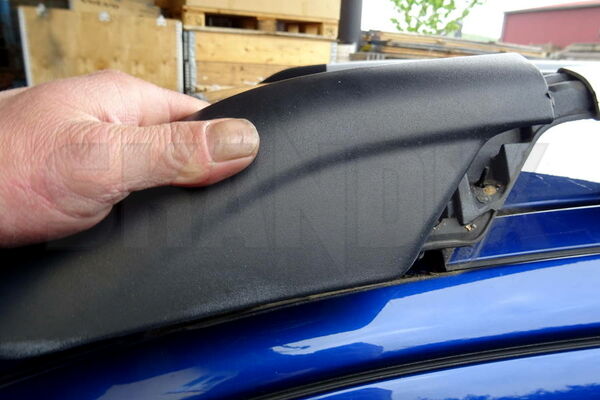
Now release the moulding from the lower three clips by folding it sideways outwards.
Then pull it forward out of the remaining upper two clips.
The clips next to the windshield frame will inevitably be destroyed, the two upper ones usually survive. Nevertheless, it is advisable to replace all of them to ensure a reasonable hold. You need 5 clips for one moulding / one side:
3 pcs. Skandix 1017092
1 pcs. Skandix 1027679
1 pcs. Skandix 1020321
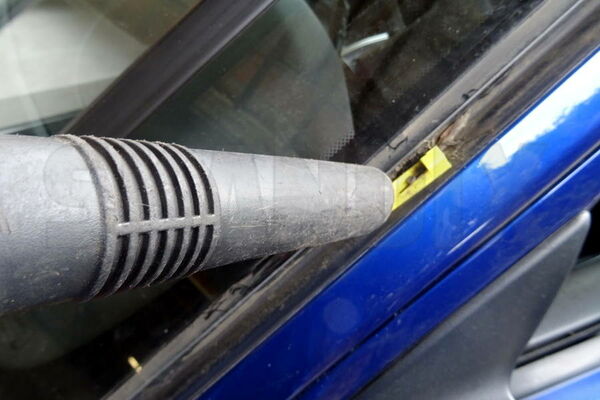
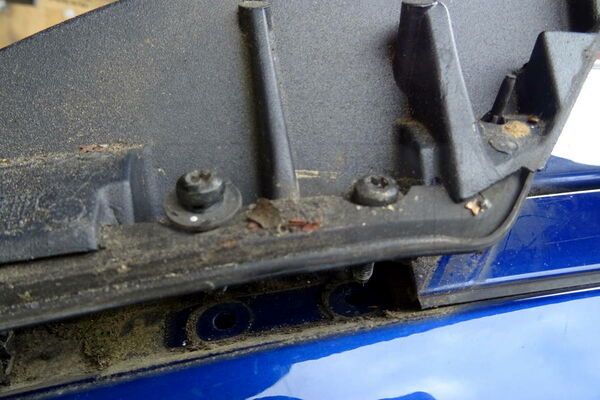
Clean the exposed gap thoroughly.
Dirt under the new clips could scratch the paint and cause rust. Vacuuming or blowing out and wiping with a wet cloth is necessary in any case.
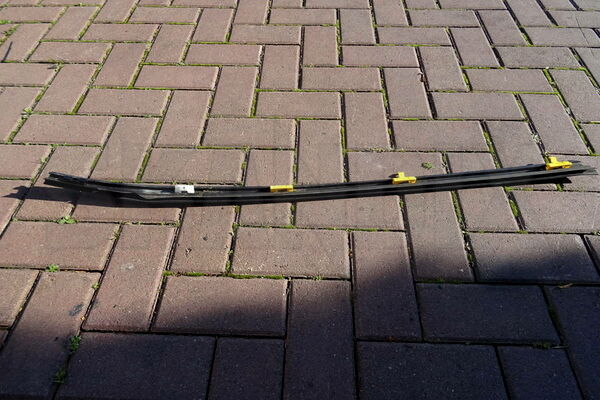
Here you can see the arrangement of the 5 clips in the bar. The left side in the picture is at the top under the railing.

The three clips next to the windscreen (Skandix 1017092) have a depth stop to adjust the height of the clip on the body edge next to the windscreen frame.
The clip is attached and pushed down until the depth stop rests on the body.
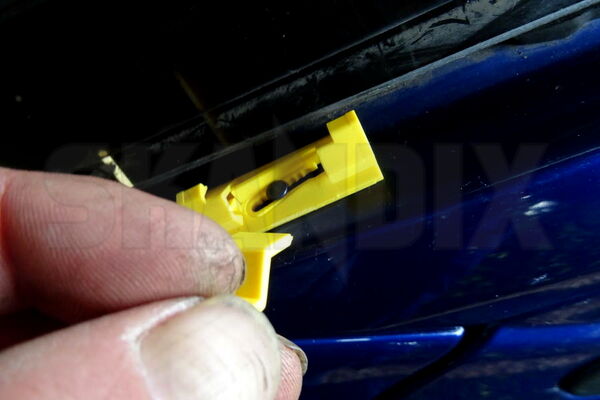
The depth stop is then broken off at the breaking point.
When the clips are all in place, slide the new moulding onto the top two clips and then snap it into place by pressing from above next to the windscreen.
The rest of the assembly is done in reverse order!
- All notes serve only as an example and do not replace the workshop instructions of the automobile manufacturers! All information is supplied without guarantee!
Additional information...
- Installation guide: Moulding A-pillar / Windscreen / Drip rail
21.12.2021, 778 KBytesDownload now
-
 1017092: Clip, Body trim Windscreen
-
 1027679: Clip, Body trim Windscreen
-
 1020321: Clip, Body trim Roof edge
-
 1041766: Seal, Windshield cowl panel A-pillar front left End Kit
-
 1041767: Seal, Windshield cowl panel A-pillar front right End Kit
-
 1079108: Trim moulding, Glas Windscreen right A-pillar plastic coated black stainless
-
 1079110: Trim moulding, Glas Windscreen left A-pillar plastic coated black stainless